My experience with extensions

IMG_2522.jpg

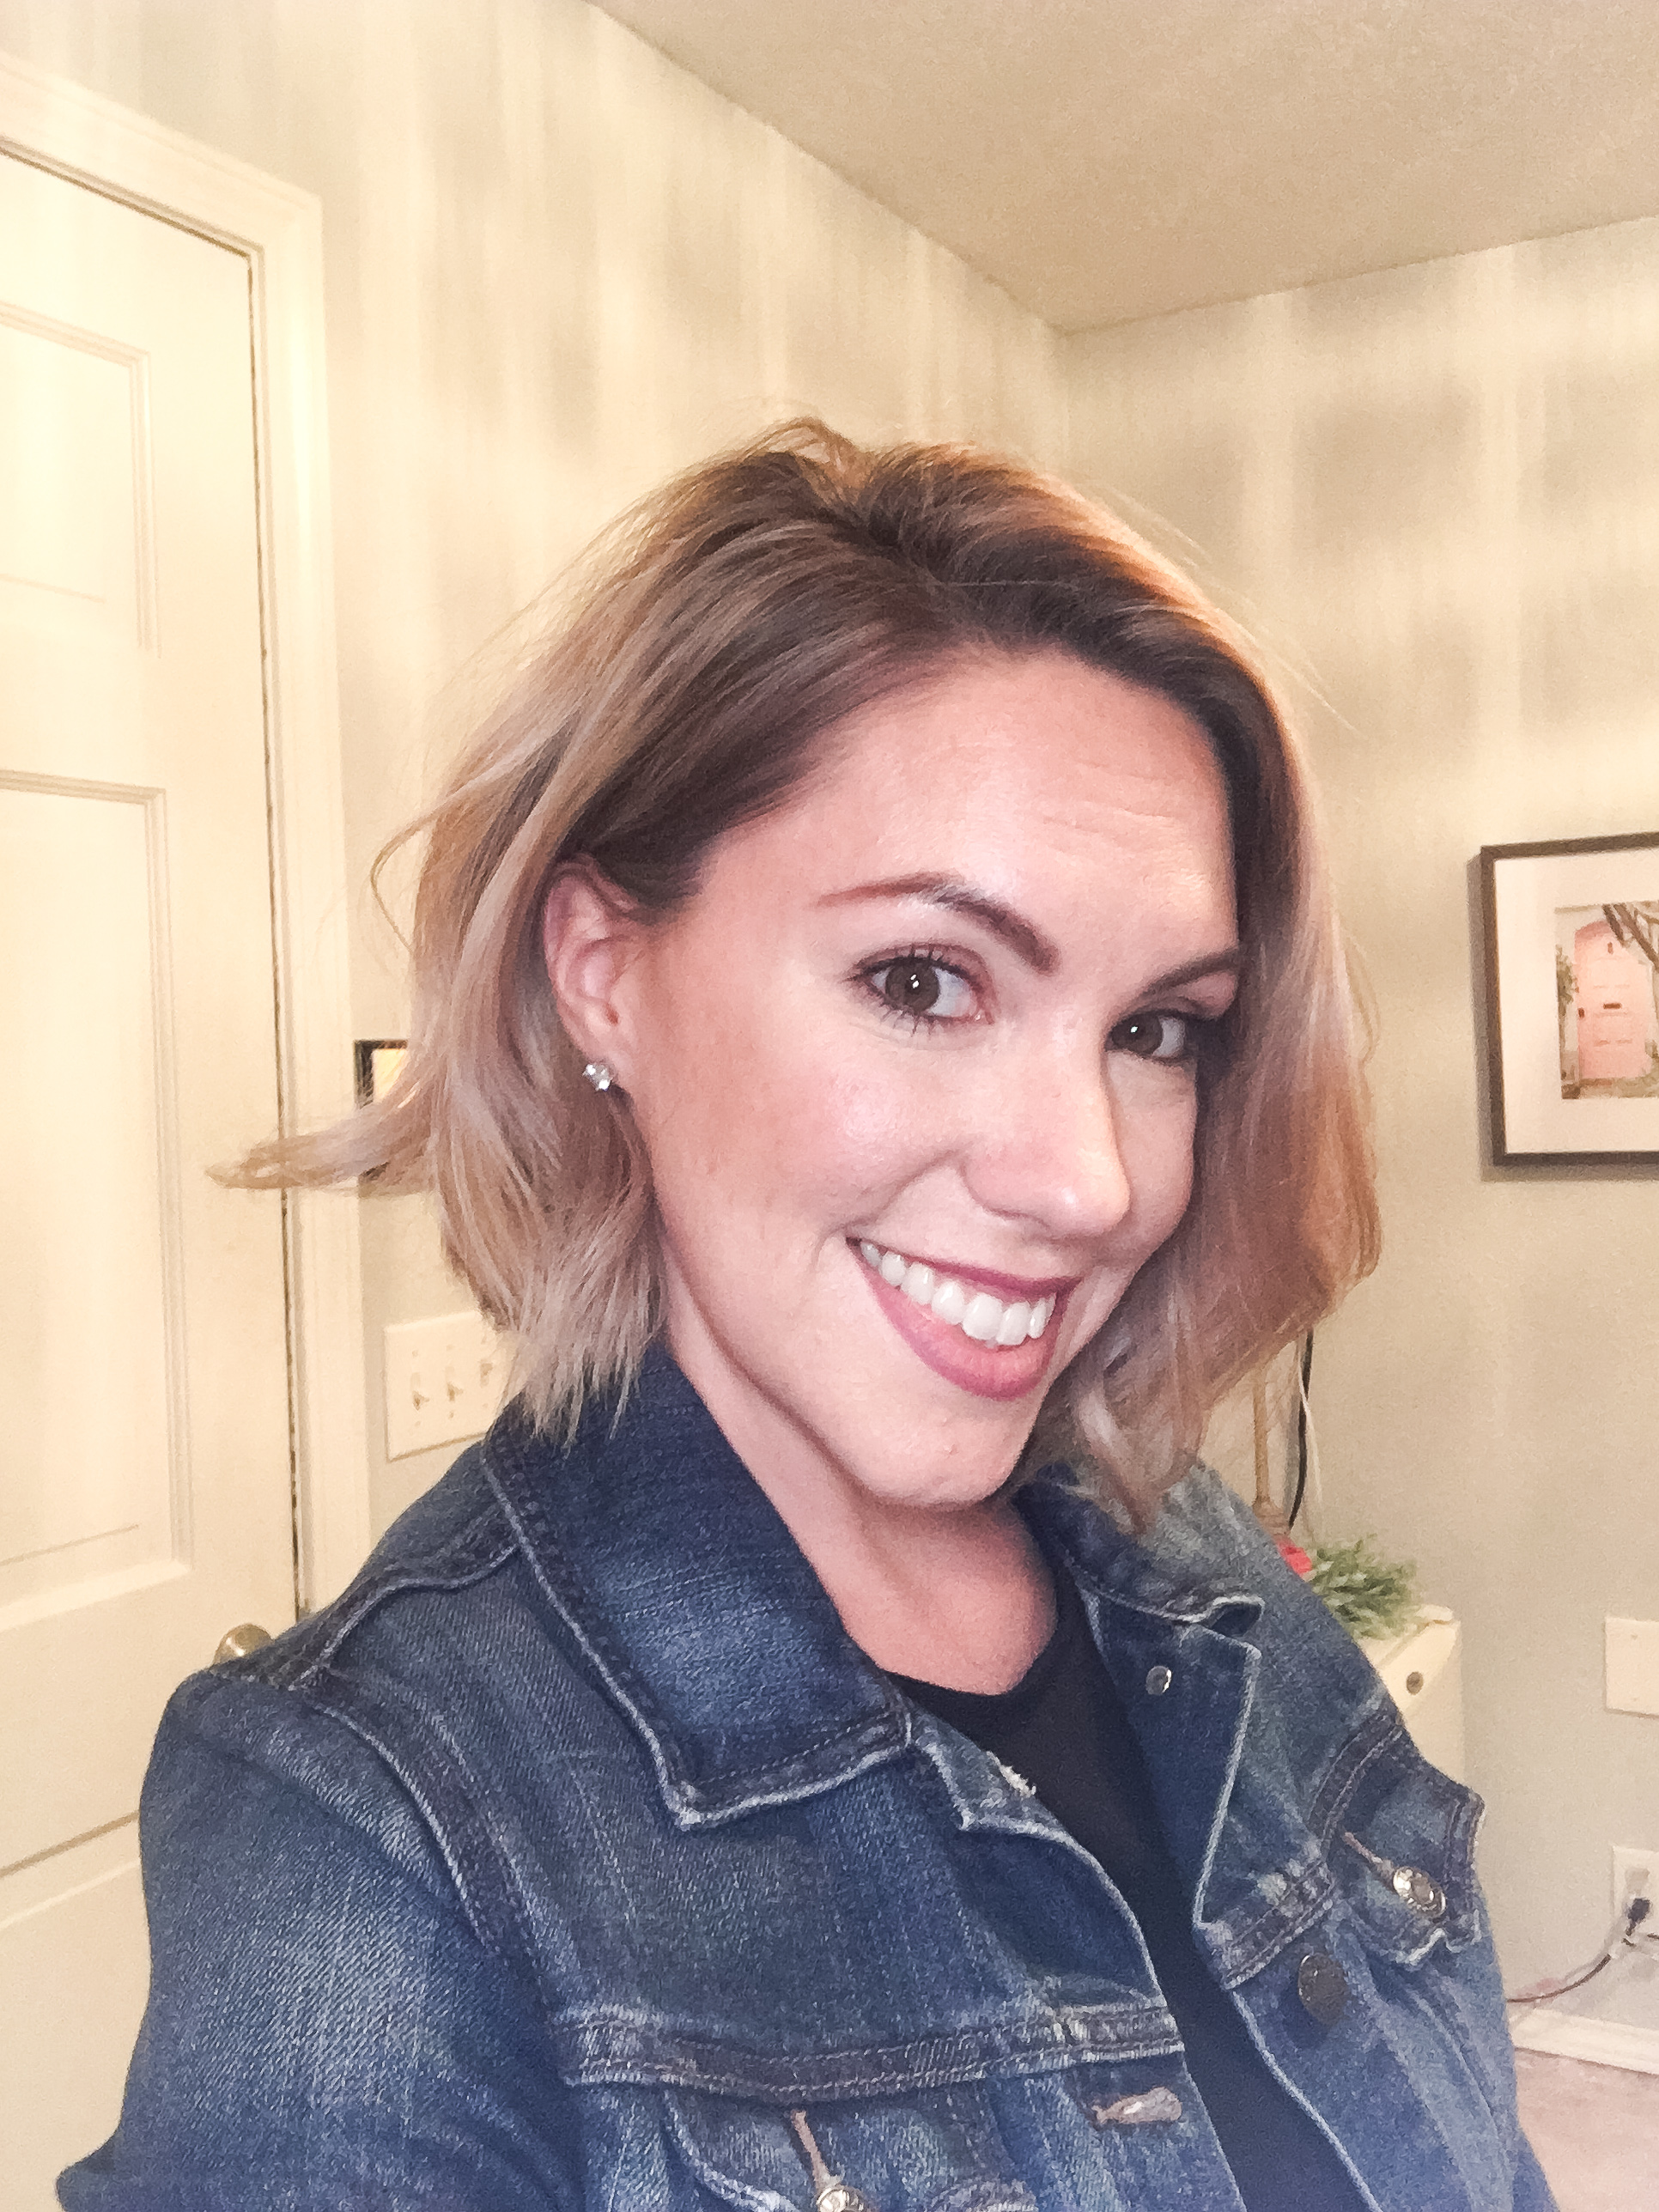
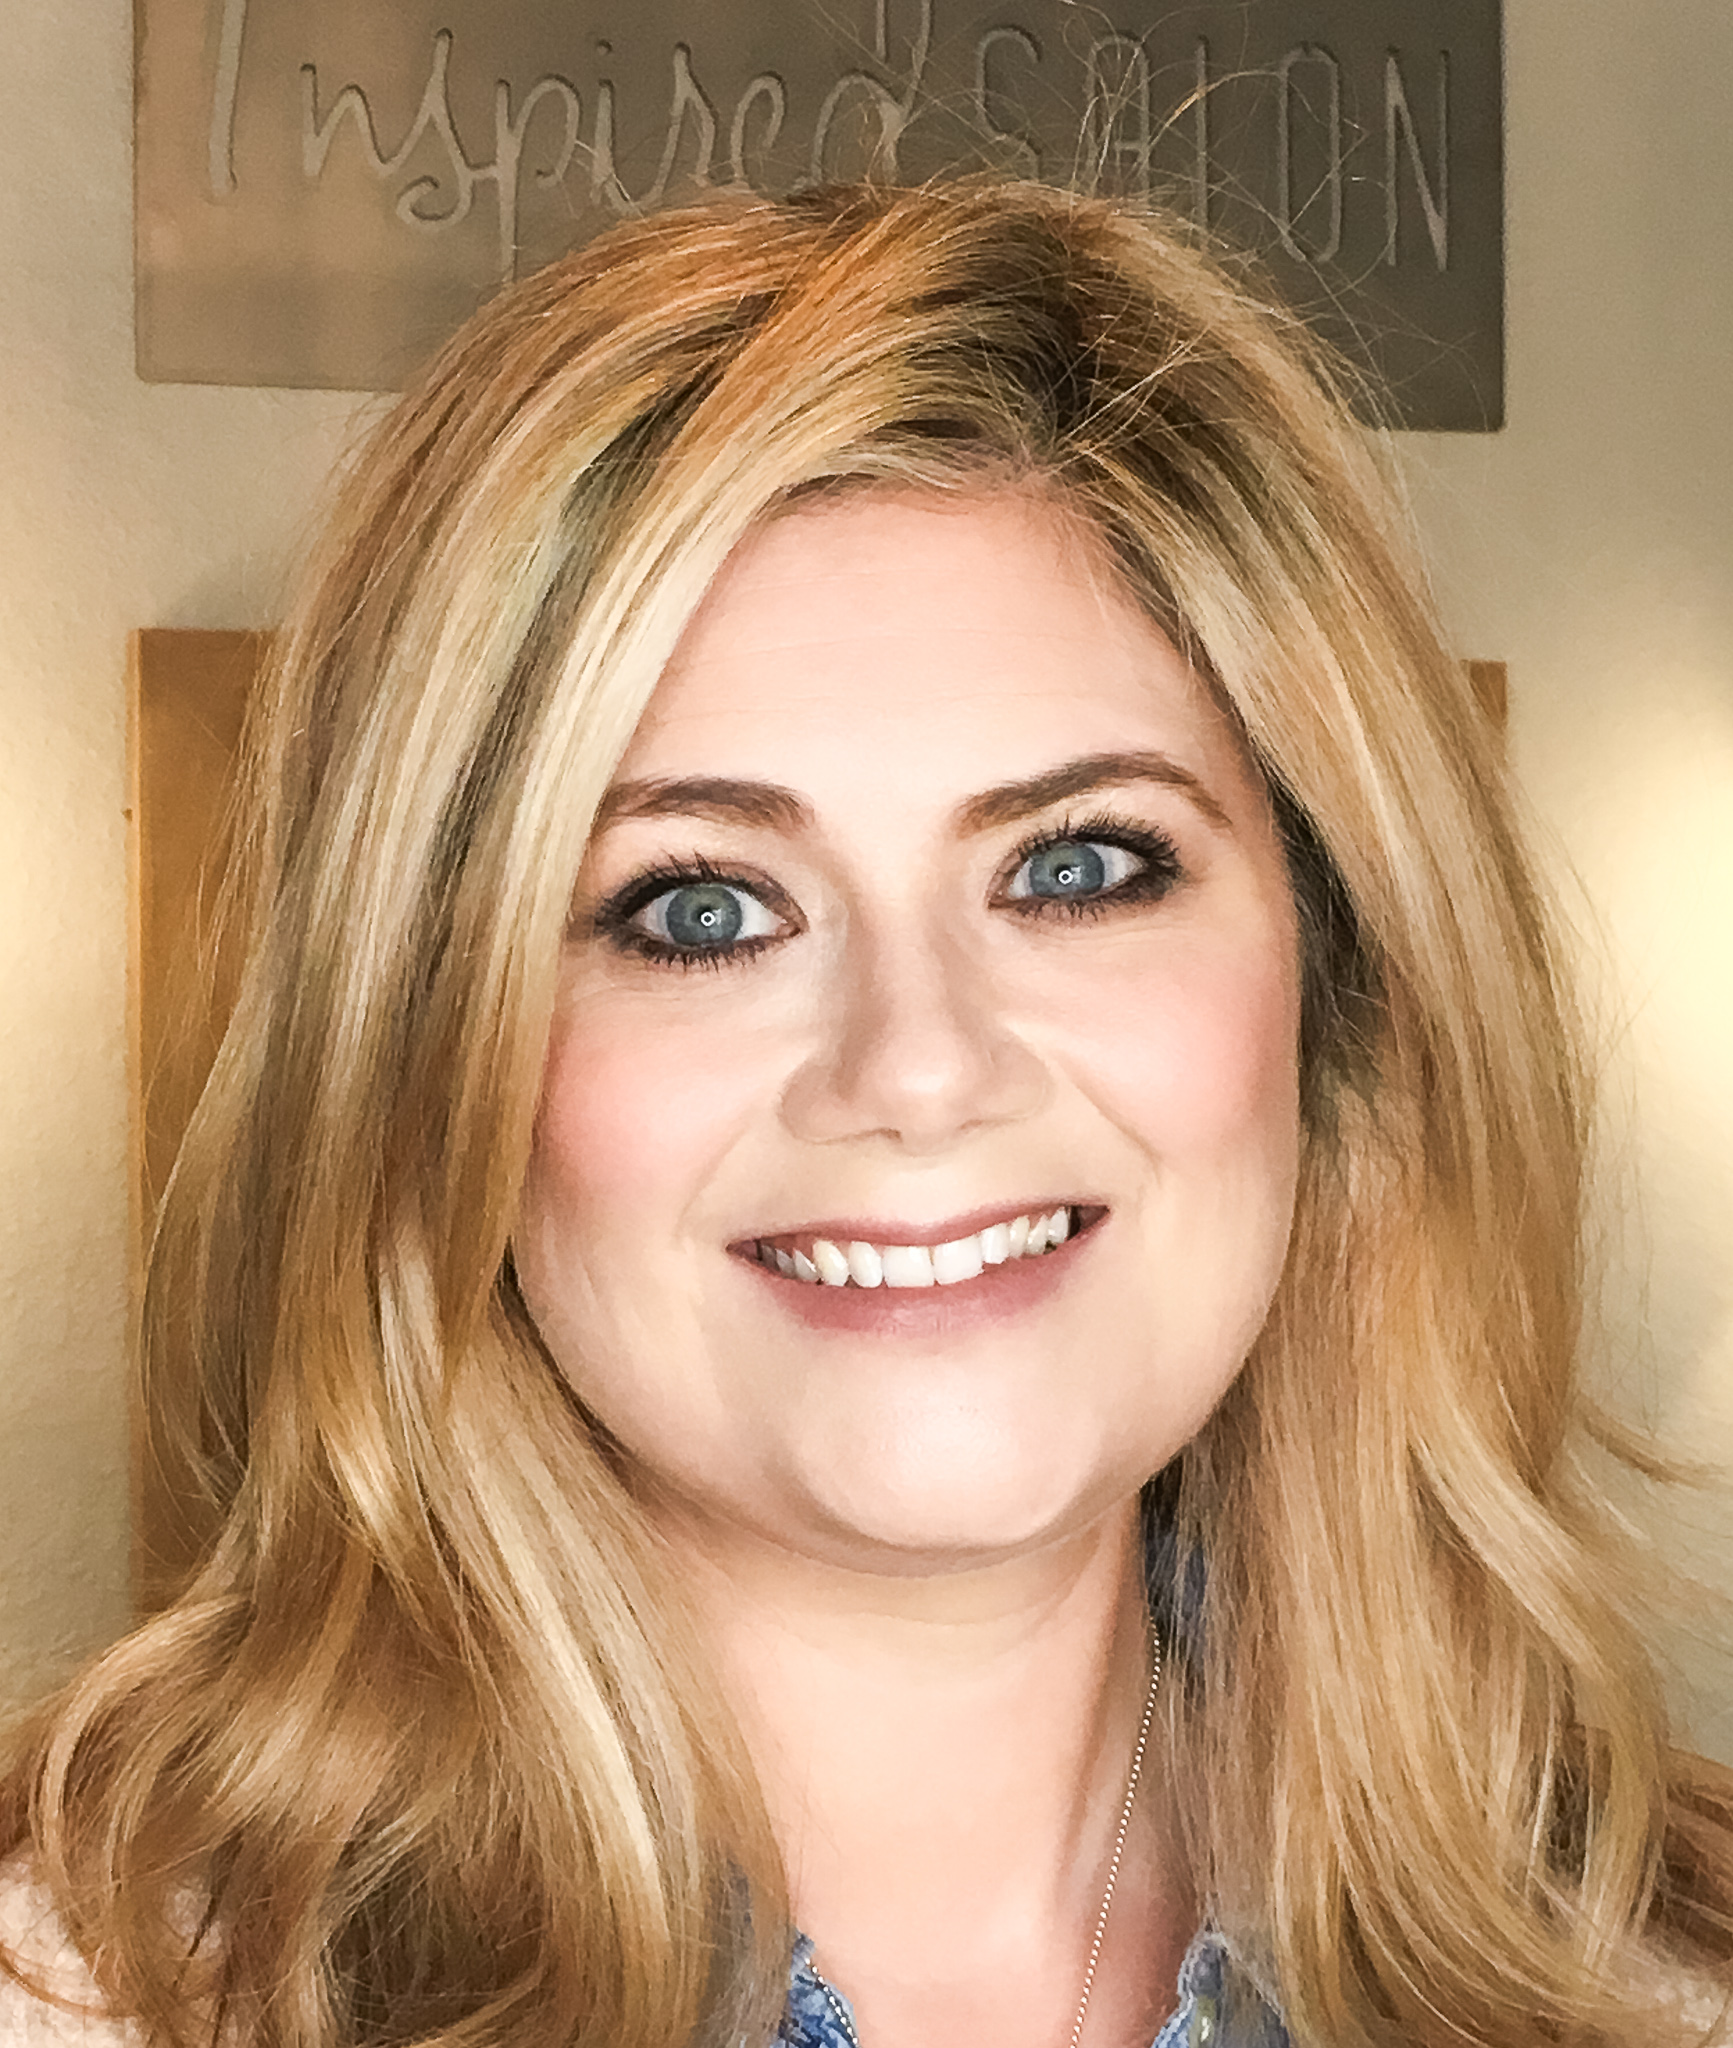
In May of this year I was looking into the idea of having hair extensions. As you can see in the picture above on the left, I had short, BLONDE hair just last year. My hair is naturally pretty dark and before I decided to start going blonde (which I knew would be a long process) my hair was a very dark eggplant color.

Needless to say, it was a long, hard process to take my hair from that to blonde. It took from December to August and my hair looked and felt like straw when I finally got it blonde. I had to cut it and cut it and cut it even shorter just to try to get the breakage off. The part that really stinks though is that all through the process, my hair really didn’t feel too unhealthy until the last time i got it bleached and achieved the level of blonde you see in the pic at the top. That’s when my hair went to crap.

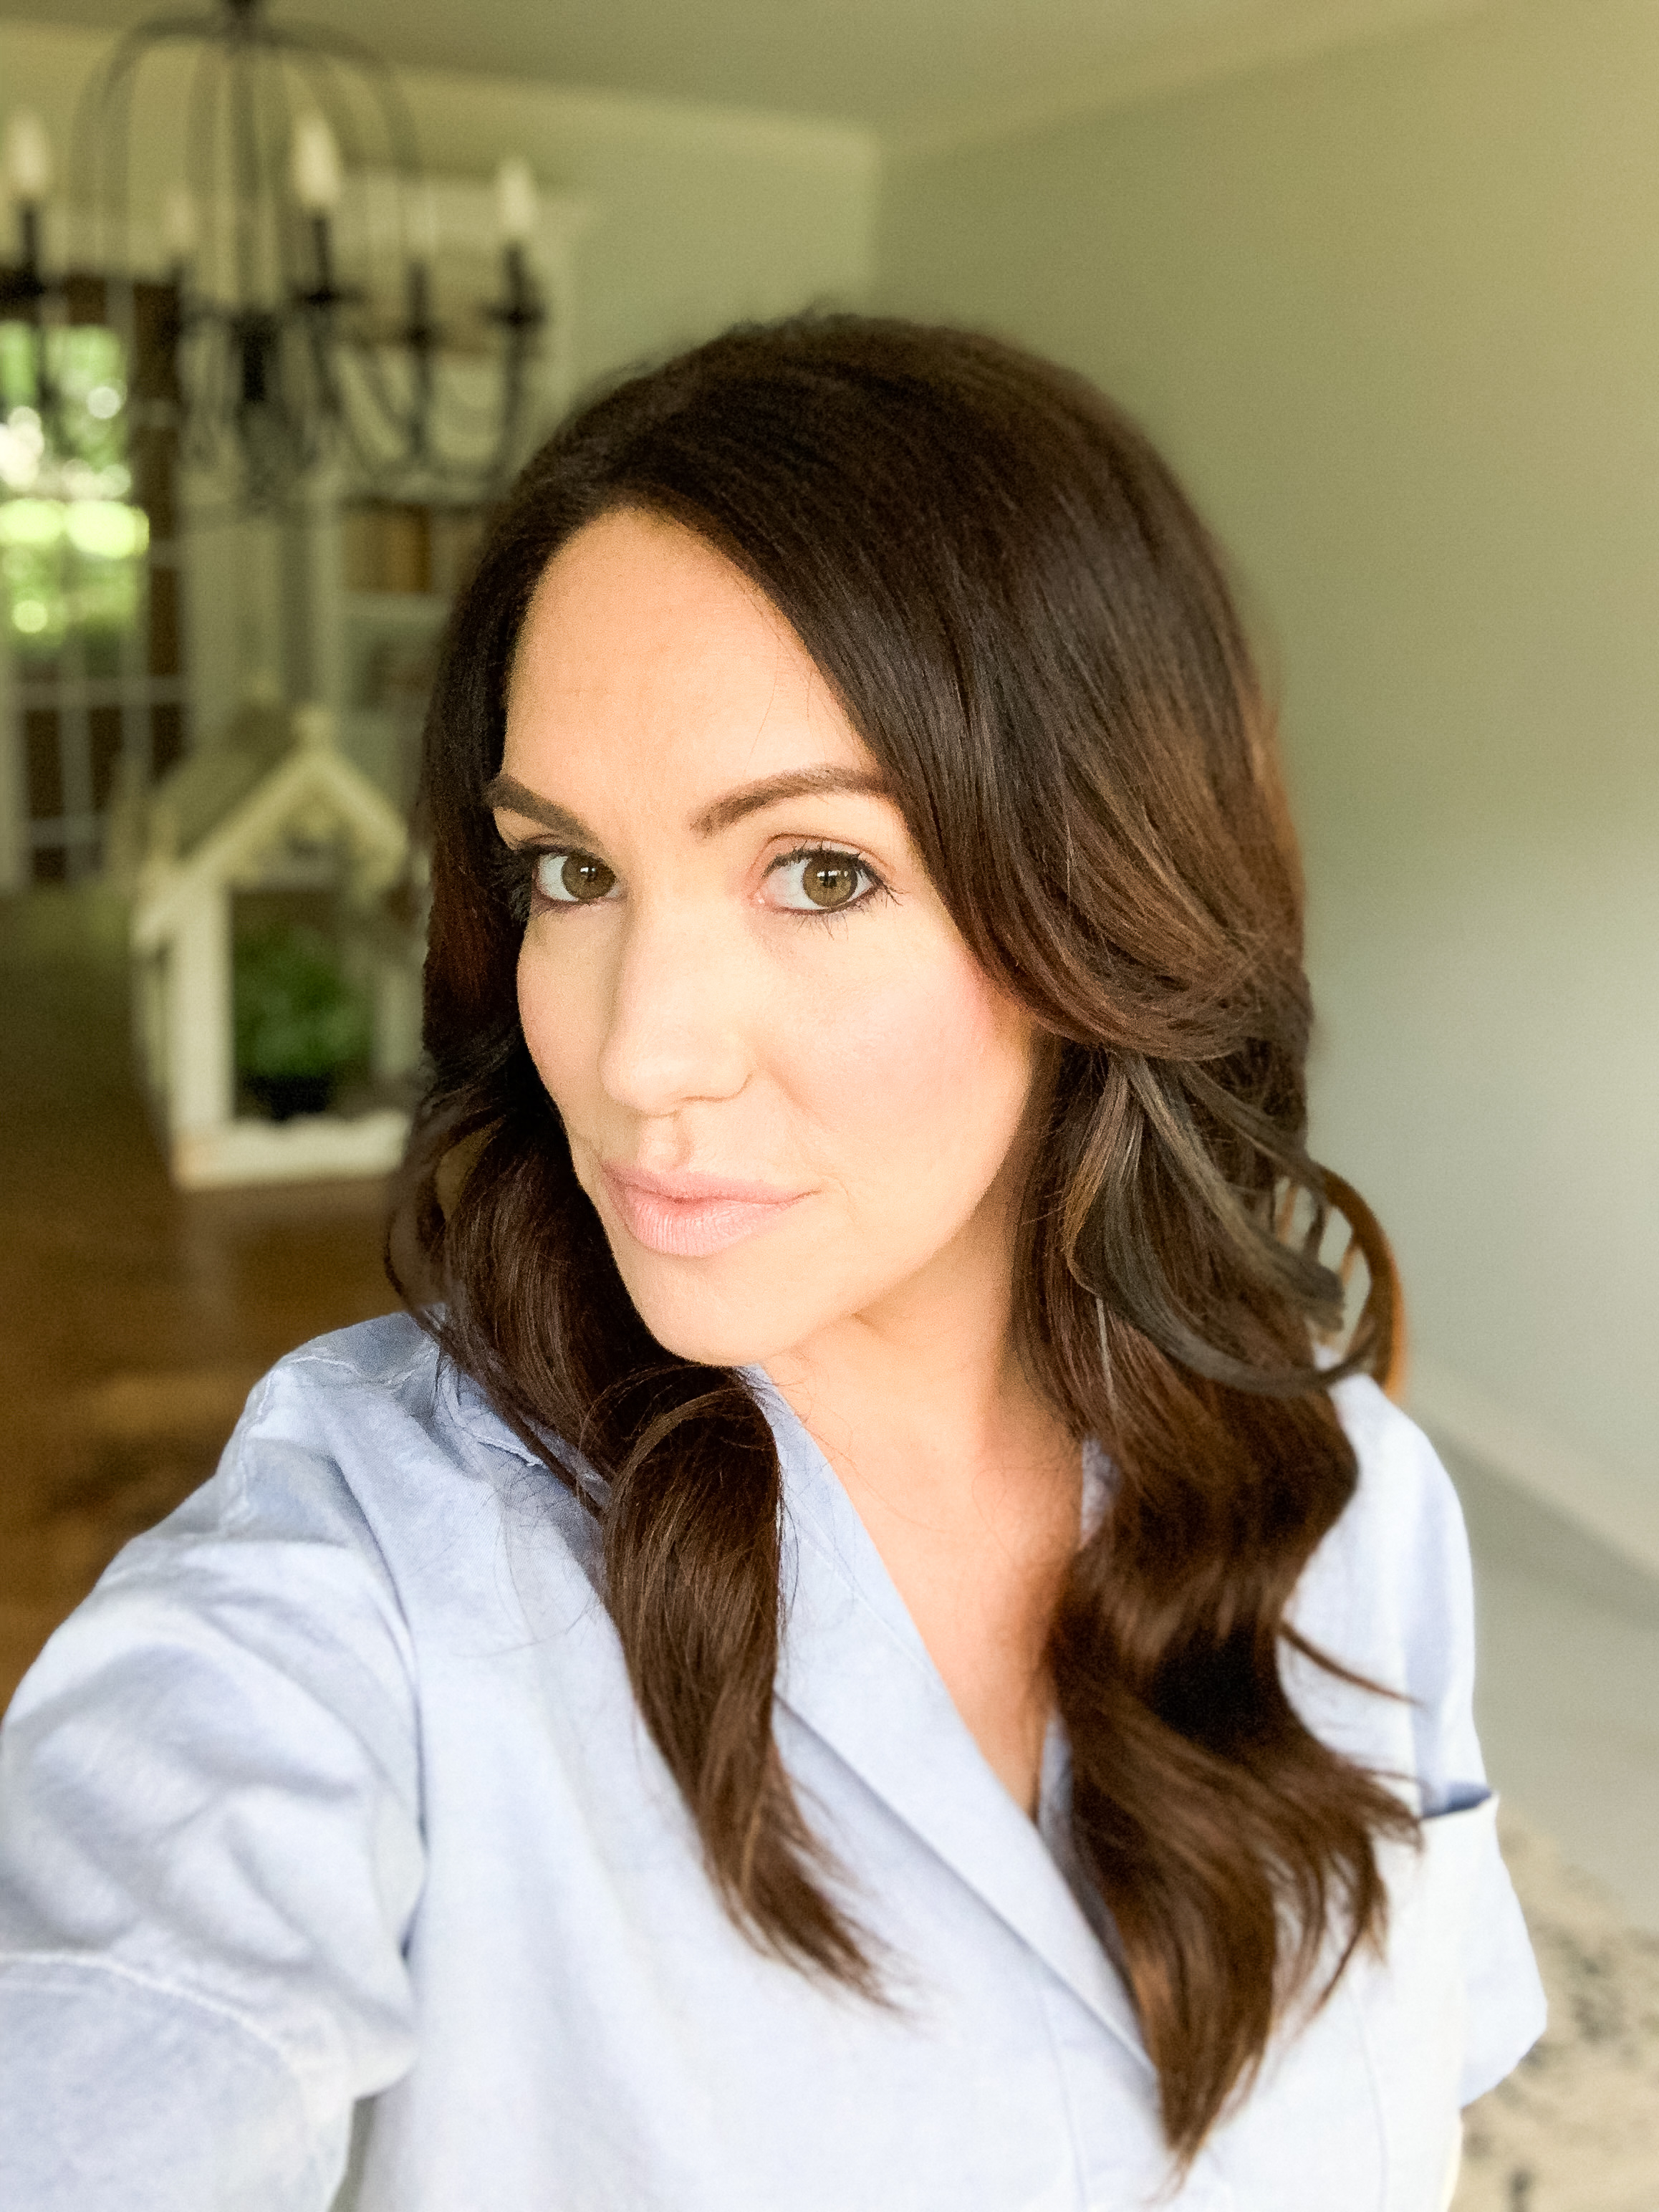
I had wanted a long, past the shoulders bob and wasn’t able to even grow it to my shoulders in the time span of 9 months due to getting more and more breakage. I had let my blonde grow out during those 9 months and the only color that touched my head was dark brown to cover my grays. I felt like growing my hair out was going to be impossible and had quite the longing for Sleeping Beauty-esque hair. It was at that time that I decided to go down the path to extension-ville. I have a pal who does a fantastic job with extensions so I called her and set up an appointment!

I purchased the extensions on my own. One of the perks of being a certified hairstylist is the access to awesome products at wholesale prices. I bought Bohyme- Luxe Remi hand tied extensions. I got 2 packs of the 14 inch, silky straight extensions. These extensions are made from human hair which is equal parts creepy and convenient. I decided to name my hair Sheila. It just felt like that would have been her name. I know, I’m weird.

The perks of having human hair extensions is that you treat them just like you do your own hair but with a little more care. You wash them, dry them, brush them, curl them, straighten them, but you need to add more moisture to them than you do your own hair. I put hair oil (prefer Kenra revive oil) on them twice a day, morning and night to keep them healthy and shiny. I sleep on a satin pillowcase and only only use satin scrunchies or the invisibobble.

PROS AND CONS OF HAVING EXTENSIONS

IMG_6155.JPG

PROS

  1. The obvious. You get instant long hair without taking the 1 to 2 years to grow long, beautiful hair.

  2. Doubles or triples your hair’s thickness. Rock those super thick pony’s or ballet buns with ease.

  3. Get a boost of confidence with the hair of your dreams.


CONS

1. They are pricey. They are so fun to have but they sure are an investment. As we are entering into the holiday season, which means extra expenses, I need to take a break from the cost of my weave. ;)

2. The hair has a shelf-life. Hair is already dead but when it is still a part of your scalp, your hair receives your skin’s natural oils and nutrients that it needs to be healthy. The extension hair doesn’t get those nutrients so you have to really take good care of it. My extension hair is starting to look a bit shabby and feeling dry. Since I got them put in in May, they went through the summer getting sun exposure, salt water, chlorinated pool water, sweat, etc. I tried to take care of them the best I could but I truly think they’d have lasted longer if I didn’t get them in the summer.

3. For some reason, the hand tied extensions made my scalp really itchy, especially when I wore my hair up or when wearing a hat.

4. It’s hard to clean your scalp with extensions meaning you have to get used to a little build up living on your scalp.

5. Expect a mild headache for the first couple of days after getting hand tied extensions.

Would I try extensions again? Absolutely! I’m actually considering invested in some human hair clip ins to wear any time I’m feeling like mixing things up.

Hope this was helpful to anyone considering extensions!

love,

Melinda

Shop the post with these affiliate links!

Purchasing the items from the affiliate links above helps me to earn a small income which helps me support my family. Think of it as paying me to do the research and find these great products for you. I only recommend products that I use myself and that I truly love.


Stephanie's makeover

This is my gorgeous friend, Stephanie. Stephanie has like THE BEST skin and look at those eyes! I had so much fun “painting” with her natural beautiful features. Below is what I used on Stephanie.

Everything I used was from Maskcara Beauty except for what I used to fill in her brows.

iiid foundation

Highlight: Sunlit

extra highlight: linen

contour: ash

blush: hollywood

lips: plum

eyeshadow colors : On Wednesdays, Sabrina, trust.

brows: Brow Pow by The Balm cosmetics in light brown

Here’s my website to shop Maskcara Beauty! Email me for help finding your perfect colors for iiid foundation!

A grown up skincare regimen

2bw 2017.jpg

Let me start off this post by saying that I have terrible skin. I’ve had terrible skin since maybe the 9th grade. So, why should you listen to me about skincare? Bare with me.


Through my jr high years, I realized I had very oily, acne prone skin but so does everyone else at that age. It didn’t bother me too much then but as I got older, my acne began to get worse and worse and occasionally covering my entire face with RED, inflamed, deep pimples. I tried everything on the market, even accutane and nothing would clear up my skin. Accutane worked for me but only when I was taking the medication. After finishing the accutane process, my acne came right back. I’ve taken it twice.


As adults, we need to be taking care of our skin in different ways than we did when we were young. In your teenage and college years, you may not have even washed your face. I remember having friends who had flawless skin. They would never wash their face, sleep in their makeup, and wake up the next morning and put more makeup on. Flawless. I would spend 20 minutes in the bathroom removing my makeup, washing my face, using a special scrub my dermatologist had given me, and apply zit cream all over and then wake up in the morning with a bright new zit in the center of my forehead. (insert eye roll) Wether you never washed your face as a teen or spent so much time catering to your skin in the bathroom each night, you should NOT be using the same regimen that you used in those teen/ college years. In our early adulthood, our skin’s oil production was different than it is now and wrinkles were a myth. It’s time to move out of the Clearasil aisle and into the department store…or the Olay aisle. Whatever fits your budget. ;)


IMG_2966-2.jpg

Like I said earlier, I do have terrible skin. Don’t try to sugar coat it, it’s just a fact. I love myself and am fine with my skin as it is so don’t feel like you need to lift my spirits. Trust me, I’m good. I may have pock mark type scarring on my face from previous acne but I think I’m pretty and am comfortable in my skin. Anyway, I can’t do much to change my skin now because the past has taken it’s toll. Some of the scarring is permanent and I continue to get acne, despite the fact that I’m 30 years old. What I can do though is protect the skin that I have now. I want to use products that give my oily skin a deep cleaning, hydrate my skin, keep new wrinkles from forming, and exfoliate to keep this skin looking as youthful as it can for as long as it can.

Here’s my personal night time skincare regimen.

Remove makeup

Every evening I remove my makeup by wetting a microfiber face cloth with warm water. These babies remove makeup better than makeup removing wipes and are reusable! You simply wash and reuse! These wash clothes that I have linked are the exact ones I have. I bought two of the 6 packs to have 12 on hand for morning and night face cleaning. Have you ever used a microfiber mop to clean your floors? All you need is water and the microfiber sucks up all the dirt right off the floor. Microfiber works the same when used on your skin. Love.


Cleanse

Now this next product might surprise you but hang with me. I have a good reason for it. To wash my face I use good ole Cetaphil. Like I already told you, my skin is very oily and it’s hard to find a cleanser that really deep cleans my face. Cetaphil leaves my face feeling really clean and gives me a little bit of acne fighting ingredients. I do not recommend Cetaphil to people with normal or dry skin because it is very drying. I wash the cleanser off with the clean side of the microfiber cloth that I used to remove my makeup. I’m telling you, microfiber face cloths are amazing.

MILK Toner

MILK Toner

Tone

Next I use a skin balancing toner. This is my secret ingredient. This amazing toner helps reduce redness and inflammation as well as balancing your skins ph. It is this MILK toner by Maskcara Beauty. The vitamins in this toner help keep your skin smooth, hydrated, and even. It is alcohol free which is fantastic because alcohol is really not good for your skin. It dries your skin out too much which makes normal to dry skin too dry and oily skin even more oily because your skin will produce more oil trying to overcompensate for the moisture loss. Why use a toner you ask? Toners close the pores (or should be closing your pores) and calm your skin down after cleansing. They prep your face to be ready to absorb your moisturizer, and yes, everybody needs moisturizer. Take it from the grease ball. I have never met anyone who’s skin is as oily as mine and I moisturize almost every night. This toner helps to keep my skin balanced despite the fact that the cetaphil cleanser is so drying. If I use Cetaphil and don’t apply my toner and moisturizer, my face gets an itchy burny sensation and that is not ok with me.


Moisturize

MILK Creme

MILK Creme

The final step in my nightly skin routine is this MILK creme. (my moisturizer) This creme contains 16% natural milk components and can moisturize the driest of skin. With it’s lactic acid and vitamins A and E, it helps promote skin cell turnover and reduces fine lines and wrinkles. I use this all over my face and neck as well as around my eyes rather than using an eye cream. With it being winter, my skin feels so dry after cleansing but smoothing this milky creme over my skin instantly replenishes that moisture and feels like giving my skin a nice big drink.


That is what I do every night for my skin. if nothing else, at least remove your makeup every night. When you remove your makeup, you’re letting you skin breath and giving it a light exfoliation. Exfoliating is important for aging skin because it helps the skin shed old skin cells and create new skin cells. As we get older, our new skin cell production slows down, thus, wrinkles. Exfoliating keeps the skin thinking it’s young and keeps it creating new skin cells.


I personally prefer a good, deep exfoliation so I give myself microdermabrasion once a week using the PMD Microdermabrasion tool. Microderm is the process of using tiny crystals to exfoliate the skin and then draws out dead skin and impurities by using suction. It’s basically like sanding you face down with a table sander and then sucking it clean with a shop vac. Ha! This results is fresh, rejuvenated, healthy skin. I love that I can do this at home and do it so often. To have this done weekly at the spa would cost you $300 a month minimum! Below is the PMD Microderm tool that I have.

I’d love to hear what you use on your skin and why! Do you have any secret ingredients or amazing products that you will never part with? Tell me about them in the comments! Have a great weekend, my friends!

love,

Take the quiz! (2).png

Disclaimer: Clinking on the links provided may result in me making a small commission.

Another Amanda Makeover

I posted the before and afters of my sister, Amanda last Monday and this Monday I have another Amanda makeover to show you! Same name, different Amanda.

Amanda is so cute and youthful looking. She looks great in her “before” and in her “after” pic, I think she is looking kind of bridal. She’s wearing soft, natural tones, giving her that sweet, romantic look that can work for a day or night look. Read below to see what I used on Amanda S.

Maskcara Beauty iiid foundation

highlight: Aura

extra highlight: linen (under eyes, bridge of nose)

contour: Stone

cheeks: baby watermelon

lips: desert sunset

eyeshadow colors: On Wednesdays, Mi hija, Sabrina, and Coco

Everything listed above is available here.

Eyebrows: Brow Pow by The Balm cosmetics in light brown

Happy Monday, friends!

Take+the+quiz%21+%282%29.jpg

Makeup Do Not's

Makeup.png

Being in the beauty industry, I often notice common makeup mishaps. Makeup should be used to enhance your natural beauty but when applied incorrectly, can take away from your God given gorgeous features. Here are some makeup mishaps that I frequently come across.

Eyeliner on the bottom only.

The purpose of eyeliner is to bring out your eyes. You can make them look bigger, make them “pop”, and make them look dark and sultry. When eyeliner is placed only on the bottom lash line or water line, it drags your eyes down instead of lifting them up, making them appear droopy and bottom heavy which can make the brightest of eyes appear saggy and tired and I don’t think anyone is trying to go for that look. When applying eyeliner to the top lash line only, you make your upper lashes look thicker and heavier and therefore magically making the eyes appear to be more open. Putting liner on both top and bottom lash line/ water line can really make the eyes pop and stand out. No liner at all accompanied by mascara also makes the eyes look bright, youthful and doe eyed. See if you can see the difference in my eyes in the photos below.

Too heavy on the bottom, almost making eyes appear to be upside down.

Too heavy on the bottom, almost making eyes appear to be upside down.

eyeliner on top and bottom (6).png
No liner, just shadow applied in outer corner of upper and Lower lash line.

No liner, just shadow applied in outer corner of upper and Lower lash line.

Upper eyeliner not touching lash line

When putting liner on your top lash line, there should be no gap between the liner and your lashes. As crazy as it seems, I do see this a lot. Eyeliner is not a crayon to just color on your eyelids with however you please. Like I said above, it is a tool to accentuate your beautiful peepers. If you don’t have a steady hand or your eyelids are aging and it’s hard to get an even line of liner, you could try lining your eyes with eyeshadow and an angled brush or invest in a smudging tool to help you smooth out your liner after applying. Matte shadow colors like Filly, Trust, Cole, and Salem are great for using to line your eyes. I highly recommend this angled brush for all your powder liner needs as well as for filling in your brows with powder brow filler. Not sure what color of liner is right for you? Read below for my eyeliner color recommendations.

Eye color Eyeliner color

brown black, brown, dark brown, charcoal

hazel dark brown, brown, charcoal

blue dark brown, brown

green dark brown, brown, amethyst, dark green

These are simply my recommendations and obviously you can do whatever you want. I always prefer dark brown liner over black for anyone with the exception of liquid liner. If you like to play with a lot of color when dolling up your eyes, refer to my blog post, “What colors are right for you?” This will help you know what colors will complement those baby blues…or browns… or greens. Ha!

eyeliner on top and bottom (7).png
eyeliner+on+top+and+bottom+%289%29.jpg

Eugene Levy brows

I know you’ve all seen the ladies with sharpie eyebrows. Sometimes I even feel that way when filling in my own brows. It’s important to always look as natural as possible when filling in your brows. Start by going to a store like Sephora or Ulta and trying on different shades of the brow filler of your choice. I prefer brow powder like Brow Pow by Benefit cosmetics. Trying on different shades will help you figure out what color looks the best on you. Then, if you don’t want to spend the amount that Sephora /Ulta products cost, take a pic of the shade you liked and try to match it to a drug store product. Light strokes over your brows are so much better than heavy, thick, magic marker swipes.

eyeliner+on+top+and+bottom+%2810%29.jpg
eyeliner on top and bottom (16).png

Your face doesn’t match your neck

Whatever shade of foundation you choose should effortlessly blend into the skin on your neck. The neck is usually a bit lighter than the face because your face tends to cast a shadow onto your neck and thus keeps your neck from getting much sun exposure. Finding a foundation to match your neck may mean that your face will look washed out and ghostly and that’s why contouring and/ or bronzing are key to achieving a healthy looking complexion. I use Maskcara Beauty IIID Foundation. It is an easy to use highlighting and contouring foundation that provides your skin with different shades of foundation to accentuate your skin’s natural highlights and shadows.

If using traditional foundation, it’s always best to figure out what color is right for you when in direct sunlight. I can’t tell you how many times in the past Iv’e been “color matched” at Ulta or Sephora under the department store florescent lighting only to realize that I looked like a spray tan gone wrong when in outdoor lighting. You can take home samples of multiple colors and either try them on in front of a sunny window in your house or even in the car. This will ensure that your makeup looks correct in all lighting. No orange lines of demarcation between face and neck. ;)

eyeliner+on+top+and+bottom+%2812%29.jpg
eyeliner+on+top+and+bottom+%2814%29.jpg
eyeliner+on+top+and+bottom+%2813%29.jpg


I hope you found this helpful! As always, please feel free to message me any questions you may have about these tips or about your own makeup routine.

Love,

Take+the+quiz%21+%282%29.jpg

Maskcara Beauty

mediumtan.jpg
This is the beautiful Cara with a couple of her cuties. Total smoke show, right?

This is the beautiful Cara with a couple of her cuties. Total smoke show, right?

Never heard of Maskcara Beauty? You’re missing out! Maskcara is a makeup and skincare company that was created by fellow mom and beauty extraordinaire, Cara of the Maskcara beauty blog. If you don’t already follow her, you totally should. I’ve learned so much about makeup from her over the years and she is just as beautiful on the inside as she is on the outside.

Being one of her “groupies”, I was quick to purchase the foundation that she created when it first became available several years ago. It was called IIID Foundation and was supposed to create the perfect amount of warmth and brightness that we all want by highlighting and contouring. These words, “highlighting and contouring” meant nothing to me back then. The Kardashians makeup artists hadn’t yet shared their secret of this phenomenon.

The trick to this IIID Foundation (that I love and wear every day!) is to apply multiple shades of foundation to your skin in the right areas to create a perfectly bright and contoured complexion. Think paint by number.

This is just to give you an idea of what colors go where.

This is just to give you an idea of what colors go where.

IIID Foundation has a buildable coverage with no need for concealer. Each shade comes in a small tin of it’s own which can be stored in a magnetic compact that comes free when you buy 4 tins! If you’re the kind of girls who gets excited by cute packaging, you’ll really appreciate the cute tins and compacts from Maskcara. ;)

For the easiest, most basic look, you will only need 3 colors with the option of an illuminator to add extra glow.

You will need a contour, highlight, and blush of your choice. The contour color goes under your cheek bones, around your hairline, the sides of your nose, and on your jawline. The highlight color goes everywhere else; your under eye area, over your eye lids, forehead, jaw above the bone, above your upper lip, chin, and bridge of nose. The blush obviously goes on your cheeks but can double as a lip color as well.

8G2A1802.jpg

For our novice makeup gurus, you may like 2 contour colors and 2 highlight colors. I like to use a lighter contour for my initial base and then a darker contour after applying my highlight to “chisel” certain areas to look more defined. I also like to use a lighter highlight color under my eyes for extra brightness to make my peepers look more awake. Watch this video to see how I apply my IIID Foundation.

When Cara developed this makeup, she wanted to make it easy for us basic Betty’s to be able to experience the glam of Hollywood and to do it in 5 minutes because we’re busy mommas!

Inspired Salon  Sarah Ashley Photography-31.jpg

I't’s definitely different from any other foundation I’ve ever tried so it does take some time to get used to, but once you get the hang of it, this stuff is such a help in shortening your morning routine and I swear the bright look you get from wearing it is unmatchable. Love it!

As a plus, these products are cruelty free, paraben free, gluten free, and are made with a bee’s wax base. It’s nice to know that your makeup is free of nasty stuff.

Check out my Maskcara Beauty website to browse all the amazing products! Please comment below if you have any questions or feel free to email me. If you’re wanting to try IIID Foundation for yourself and you’re local, let’s set up an appointment to try it out on your skin! If you’re not local, no worries. Simply message me a picture of yourself with no makeup on (and in good lighting. preferably facing a window or in the car) and I can help you choose the colors that would be right for your skin tone.

Until next time,

Take the quiz! (2).png


6 Tips for growing out Blake Lively-esque hair

How to grow out Blake Lively-esque hair. (1).png

Deciding to grow out long, strong, healthy hair requires some prep and planning.

Here are some tips to help you achieve long, luxurious hair.

 1.Cut your hair

That may seem totally strange to cut your hair when you want your hair to grow but before deciding to grow out that mane of yours, you need to make sure your hair is in it’s healthiest state. No split ends or dry, fried hair. If you have split ends or damaged ends, your hair will continue to break off or split giving itself an unwanted trim. If you have a shoulder length cut with unhealthy ends but you want to grow your hair down to your booty, start by either getting a blunt chop (if you’re really brave) to give yourself a blank slate or continue to get a little trim every 4-6 weeks until all of those yucky ends are gone.


2.No bleach for you

The mane goal (see what I did there…) while growing out your hair is to keep your hair as healthy as possible. That will keep you from having to get trims very often and therefore getting longer hair. I would recommend that clients do not try to lighten their hair during the process of growing out their hair, UNLESS they have virgin hair (uncolored) or very healthy hair and they just want minimal lightening. While adding color (the same level of lightness/darkness to you hair) or darkening is not damaging, lightening is damaging. That doesn’t mean that you should never lighten your hair, rather just wait until your hair is at your desired length and/or super healthy and then you won’t have to worry about frying your ends, which in turn requires a trim and therefore leaves you having to go shorter rather than growing longer. Get it?


3.vitamins

There are certain vitamins and supplements that can really help speed up your hair growth and also make your hair healthier.

I would recommend taking biotin. Biotin helps promote healthy hair, skin, and nails. Also, even if you’re not pregnant, you can take prenatal vitamins to aid hair growth. My regular primary care doctor wrote me a prescription for prenatal vitamins to take as a daily vitamin and said it was perfectly fine to take as a daily vitamin even if you’re not pregnant or planning to become pregnant. Obviously, as with anything, everybody is different and we all take different supplements and medications so do your research before taking anything new to make sure it’s good for you.

Here are some gluten free, inexpensive prenatal gummies I found on Amazon and Here is a great option for Biotin capsules.


4.Use good products

Like most things in life, with hair products you get what you pay for. I think that investing in good hair and skin care products is well worth the money. Having a good hair care regimen is part of good self care. That new hair growth that’s currently at your roots will someday be your ends. It could be with you for the next 10 years depending on how long you decide to grow your hair out. We need to be treating our hair like gold because if we are harsh to our hair, it’s not going to last us very long. It will split, break, fall out, frizz up, fade, etc.  It’s always good to use gentle products that are nice to our hair and skin. I like to use sulfate free shampoos and very moisturizing conditioners on my ends. Currently, I am using AG’s Refuel and Restore shampoo and conditioner. My hair is pretty dry and somewhat damaged from going blonde but after just one wash I could feel a difference in the softness of my hair. It’s good stuff! If your hair is fine or thin, you may want to try something lighter or thickening like AG’s Thikk Wash and Thikk Rinse. I really like AG shampoo and conditioners.

I also feel like it’s important to try to keep alcohol out of your hair when trying to keep it healthy. I use Kenra’s #21 alcohol free shaping spray as my main hairspray. Works great, smell’s even better. It’s the only alcohol free aerosol hairspray I have been able to find and I really just love Kenra products as well.

 I would also recommend using a smoothing serum before blow drying and after using heat to smooth out ends as well as add moisture back in. I love Kenra’s Revive Oil.


5. Air dry, air dry, air dry. It’s always good to skip the heat when you can. Think of a t-shirt. If you washed it in hot water every day, dried it, and ironed it, that t-shirt wouldn’t last long. Some of the hair you currently have on your head has been with you for YEARS! Treat it like your favorite t-shirt that you let hang dry and wash on cold to keep it from shrinking or thinning out.


6. Satin pillow case and scrunchie for sleeping

If you prefer to sleep with your hair down, it’s good to have a silk or satin pillowcase to prevent tangling or hair knotting up. I prefer satin because CHEAP. Here is a 2 pack satin pillowcase set I like.

If you sleep with your hair up, try using a satin scrunchie which won’t attribute to hair breakage and will gently hold your hair out of your face.


There you have it, friends. My 6 tips to growing hair like Rapunzel herself!

love,

Take the quiz! (2).png

Disclaimer: Purchasing one of the products I have linked above results in me earning a small income for doing the work of researching these products for you.

Meet Melinda

Inspired Salon  Sarah Ashley Photography-46.jpg

If you just happened upon my blog and you have no idea who I am, Let me tell ya! I’m Melinda. I’m a 30 something mommy to 3 girls and am married to my best friend, Jared. I’m a part time hairstylist and work from my home in my cute little in-home salon. Guess what?…I also have clinical depression and anxiety. No secrets here. I do my best each day to be the best version of myself to best serve my family despite the weight of living with depression. I love God and do my best to love like Jesus. Equality and justice are very important to me but I also love all things hair and makeup. On my blog you will find posts on a number of different topics. I am inspired by many things.

Not too long ago I was trying to make it as a social media influencer and beauty blogger but I just have way too many topics that I care about to be only a beauty blogger. Also, I realized that being an influencer (or trying to be) was not for me. I’d rather share ideas, thoughts, and products with my readers without pushing any products. I miss the days of girlfriends getting together and naturally sharing outfit and beauty tips rather than the influenced, impulse purchasing of today. If I somehow make a buck or two from blogging, so be it but this is solely a hobby blog. I love writing and I especially love writing about the topics that inspire this mother. Hence the name, A Mother Inspired.

Take the quiz! (2).png